


Choosing Materials For Solar Panel Mounting
There are various mounting materials you might use, depending on where you mount your solar panel array. Let’s cover a few options below:
Aluminum: is strong, lightweight, and resists corrosion. It’s easy to work with an aluminum angle, and any home drill will suffice for the holes you’ll need to create. In addition, you’ll find that the material is compatible with most solar panel frames. However, aluminum is not advisable if you need to weld the mount to a structure.
Angle Iron: This material corrodes quickly but is easy to use. You can slow corrosion by galvanizing the material, but the mounting brackets and the bolts are still susceptible to rusting, especially in damp climates. Angle iron is a readily available material, and brackets are easy to weld.
Stainless steel: is difficult to work with and a costly option. But it comes with the benefit that it will stand against the test of time, lasting decades. If you opt for a stainless steel mounting system, you should probably work with a professional installer.
Wood: is readily available, easy to work with, and inexpensive. The downside is that it degrades faster than the other options, even when treated. You’ll need clips or battens to attach solar modules to a wooden frame.
As you can see, different materials come with different benefits and drawbacks. Which choice is right for you can depend greatly on your budget, environment, and where you want to mount the array.
Where To Mount Solar Panels
There are multiple options for mounting your solar panels. The best option for you is most likely the flat surface on your home that receives the maximum exposure to sunlight.
For irregular surfaces, you can augment your rigid solar panel array with flexible solar panels. Flexible solar panels don’t produce enough rated power to be the sole choice for a residential PV array. But they can help you maximize your electricity generation potential.
Here are some of the most common options for locations to mount your solar panels:
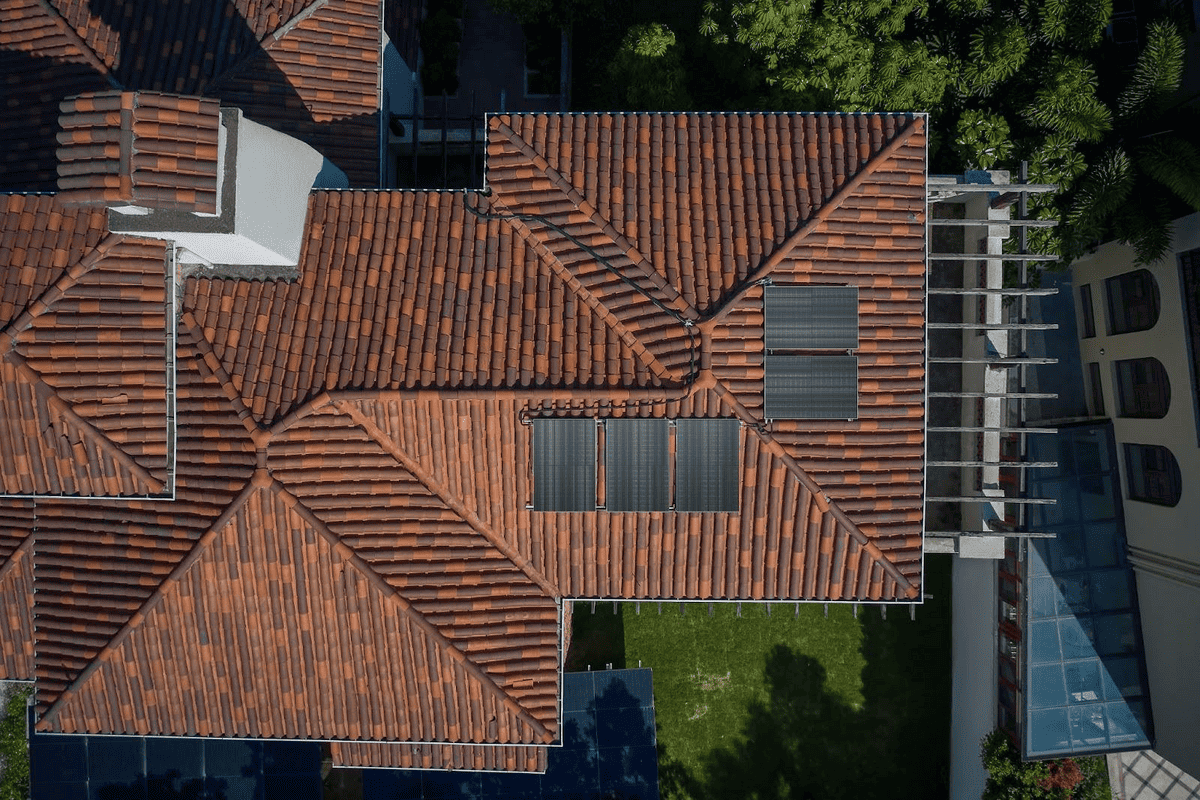
Residential Roof
A rooftop installation is often your best option for mounting solar panels on your home. Depending on the specifics of your location, rooftop panels are less likely to be affected by shade or other external factors that diminish electricity generation than other parts of the house.
You can install solar panels on various roofs, including residential homes, tiny homes, sheds, and off-grid builds.
However, rooftop[ installation can be tricky. You may face limitations due to which direction your roof faces and its incline.
Don’t forget to consider the age of your roof. Depending on the materials used, the average residential rooftop lasts between 25-50 years on average before having to be replaced. If your roof is nearing the end of its useful life, install your solar panels after you replace your roof.
A solar panel installation should not damage your home’s roof if properly installed. Indeed, they may shield your roof from sunlight, inclement weather, and other natural damage and extend its lifespan.
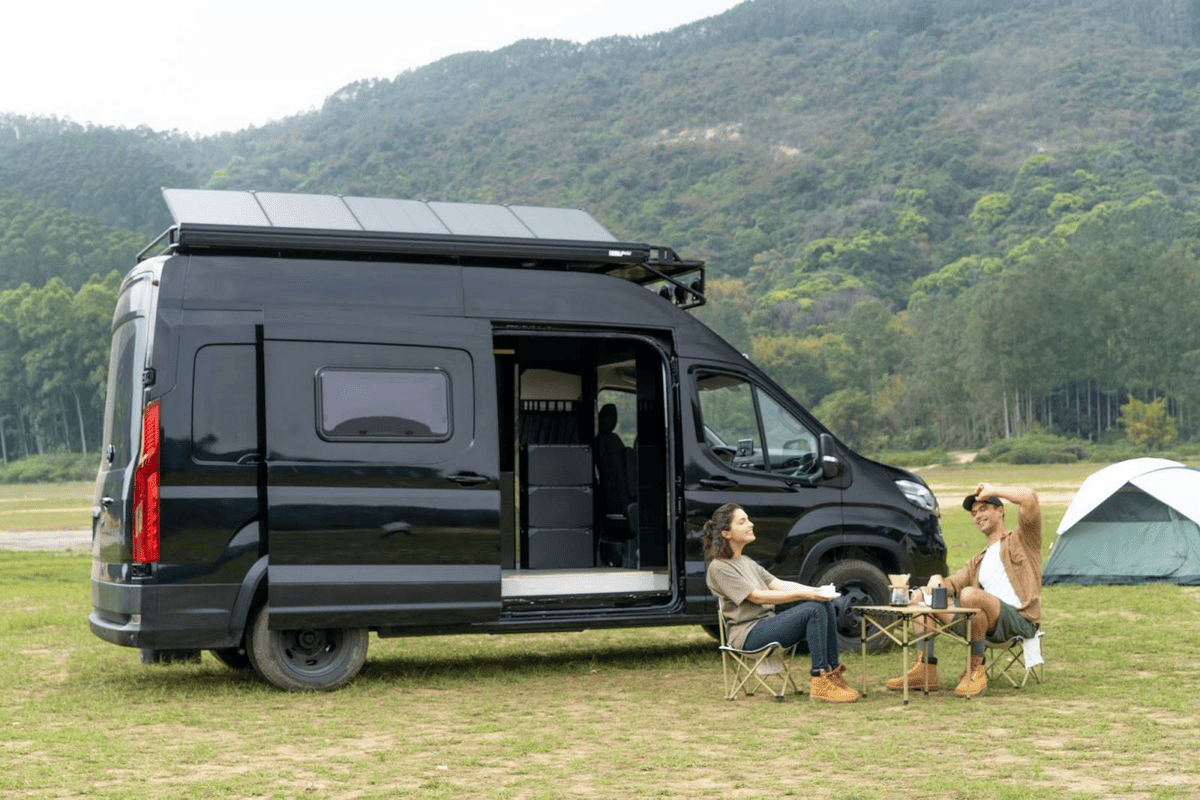
RV/Van Roof
Solar panels are quickly becoming the standard for electricity generation in RVs and campers. You can mount a PV array to the top of your RV or van to capture solar energy on the road.
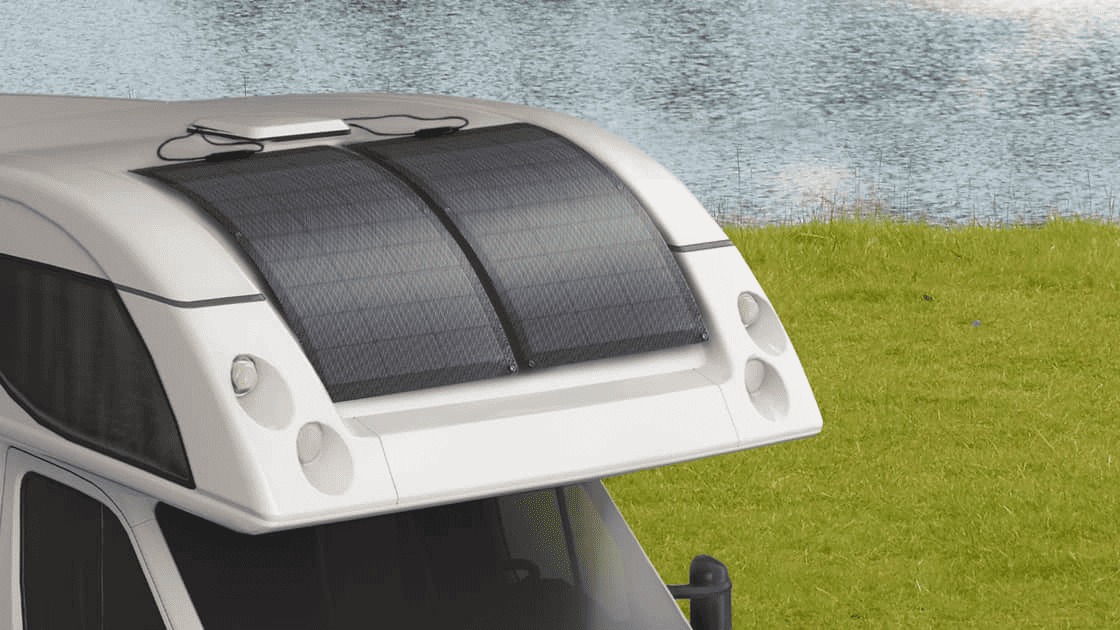
You may want to incorporate flexible solar panels for this type of surface. You can easily mount them to curved or irregular surfaces to maximize your electricity generation potential.
A Pole in the Ground
Mounting your solar panel on a pole allows you to easily adjust your solar panel angle to match the sun’s seasonal position on the horizon. However, this setup usually limits you to a single panel and is typically only suitable for situations where you don’t need a lot of electricity.
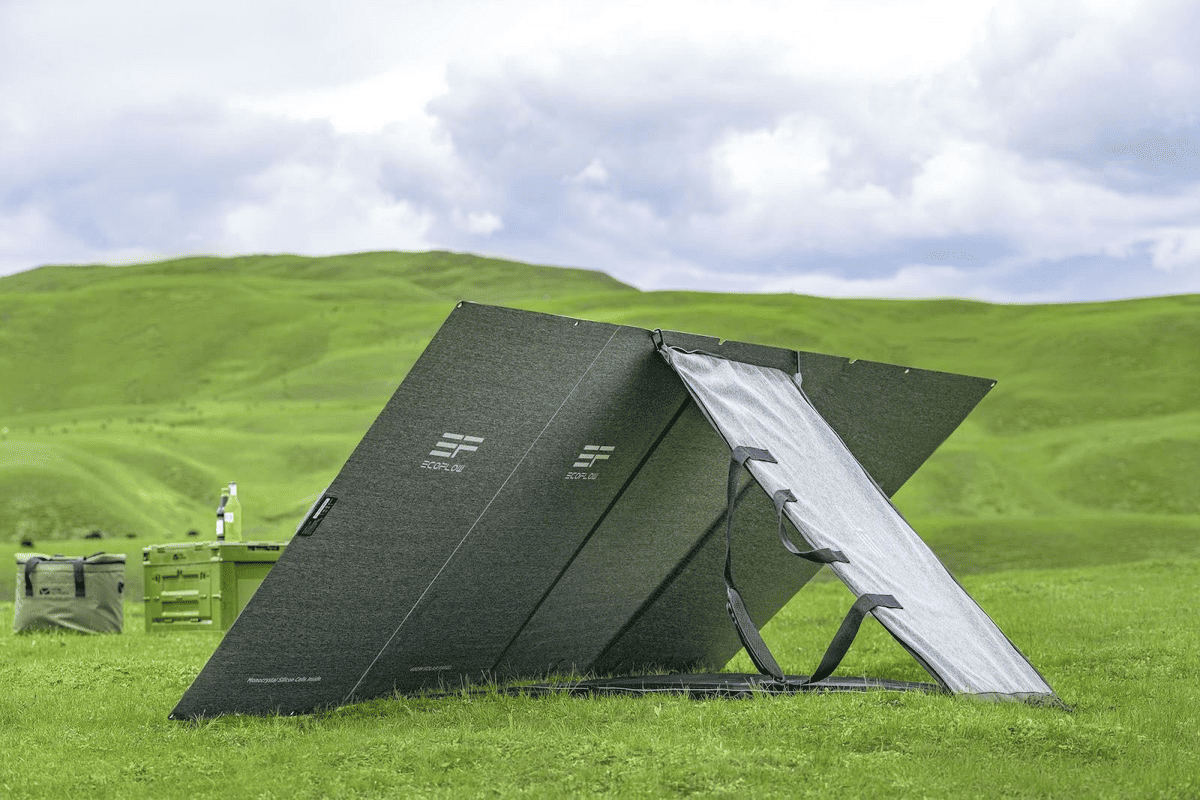
Ground Mounting
Mounting your panel on the ground is a good option if you don’t have the space on your roof or your roof is shaded or north-facing. Portable solar panels are worth considering in this case. They’re easy to reposition to maximize sunlight capture — even during the course of a day! And you can easily take them anywhere and set them up in seconds.
Permanent ground mounting is more common for large-scale commercial solar power systems. Ground mounts typically require extensive areas of land.
Window Mount
A window mount is a cost-effective solution if you only need a small amount of electricity to supplement your on-grid power or offer backup for essential devices in case of a blackout.
For apartment dwellers, window mounting might be the most viable option. However, it has obvious drawbacks, like blocking out a window. In apartments where natural light is at a premium, that might be too big a sacrifice to make.
A Wall
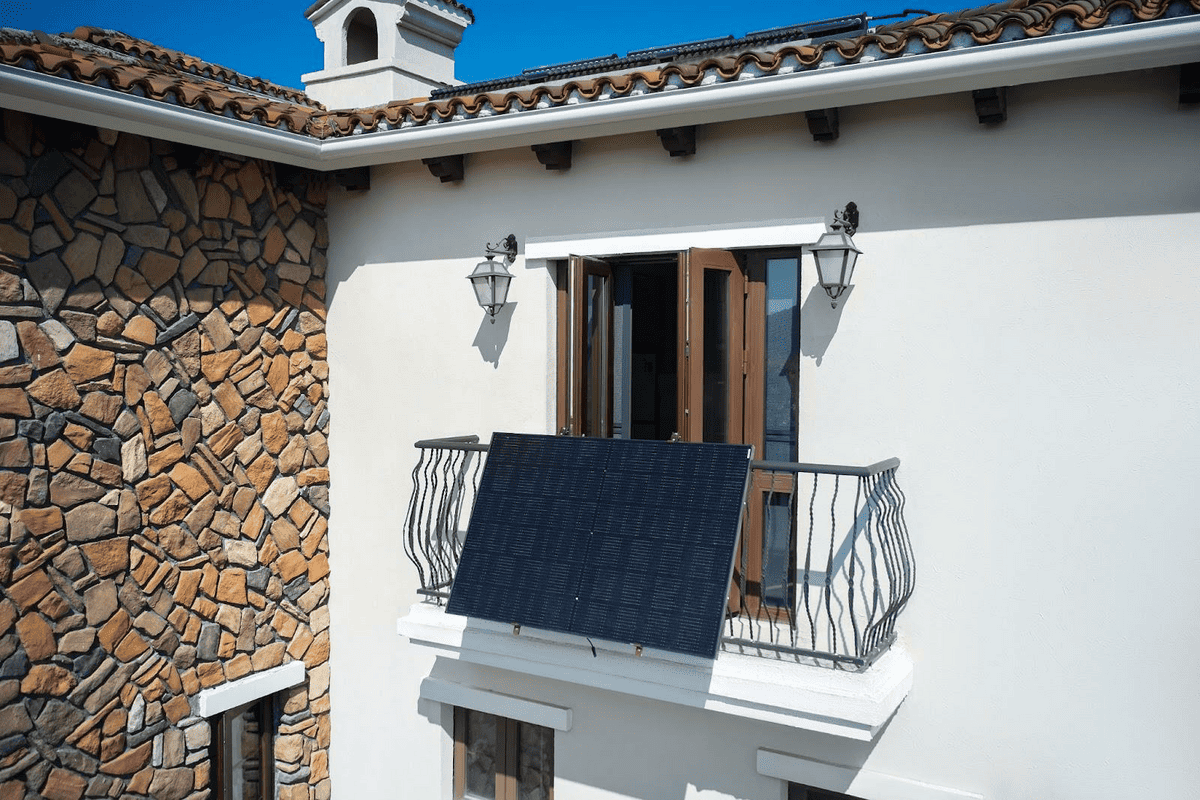
A wall-mounted solar panel may be your best option, especially if you opt for a smaller panel like a 100W rigid solar panel.
If you have a wall that receives significant direct sunlight during the day, wall mounting may be a good option and can augment a rooftop PV array.
How to Mount Solar Panels Yourself
Want to save the money you would spend hiring a professional to install your solar panel array?
Here’s a step-by-step DIY guide to mounting your panels.
Depending on various factors, your solar panel mounting process might differ slightly. For this guide, we use the EcoFlow Tilt Mount Bracket for EcoFlow 400W Rigid Solar Panel as an example.
Make sure to consult your equipment manuals before proceeding to install your panels.

1. Plan and Prepare
Start by gathering the necessary tools for a DIY installation.
Other things you should take care of during the planning and preparation stage include getting required permits and checking local requirements for offsetting structures from existing buildings and property lines.
Depending on where you mount the system, you may need to comply with additional safety requirements. For a ground-mount solar system, this might include having a fence or a perimeter of a certain distance around the solar system free of vegetation.
You’ll also want to be aware of any water wash areas, flood zones, or other factors that may lead to restrictions on your property. Municipal regulations might not let you build near those. Plus, installing a ground-mounted system in an area that floods or has frequent severe weather events could lead to problems.
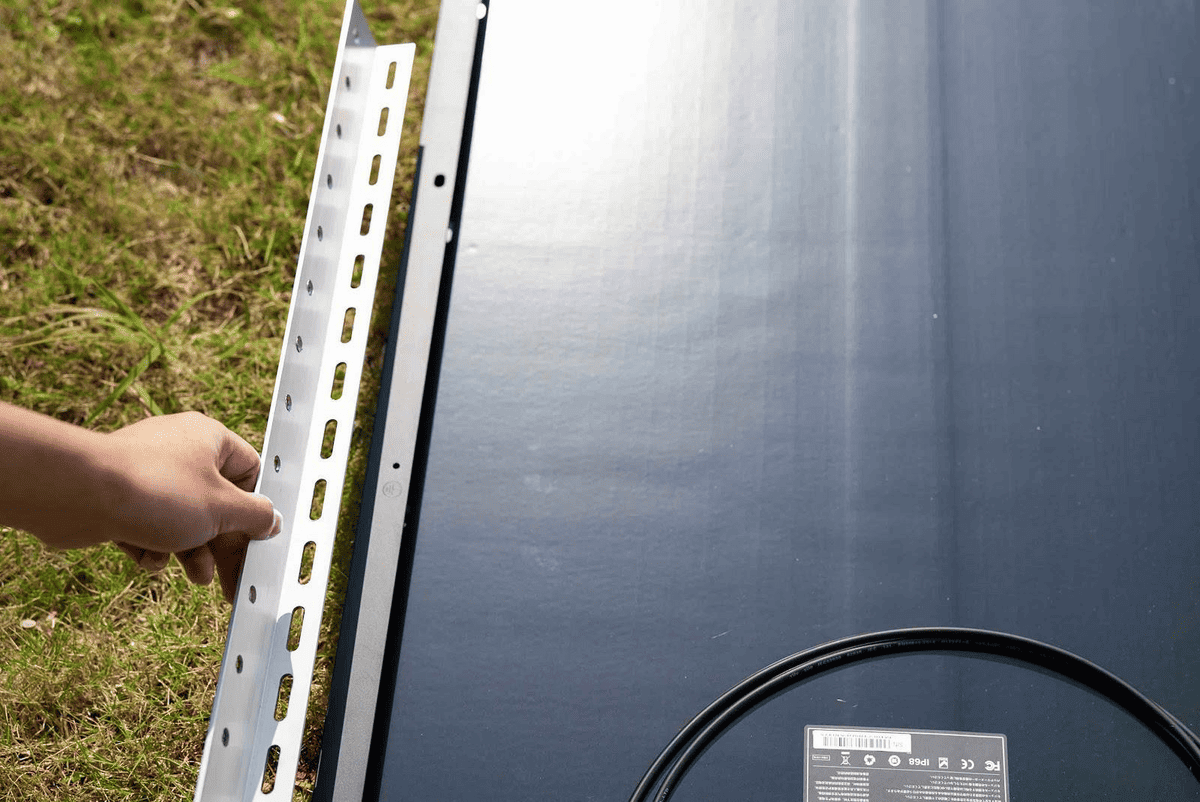
2. Attach the Fixing Bracket to the Solar Panel
Once you’ve gathered all the tools and followed up on permits and safety requirements, it’s time to set up your mounting system.
The first step is to attach the fixing bracket to the solar panel. Lay the solar panel face-down on the tarp or canvas to protect the photovoltaic surface.
You want to be sure the mounting holes on the back of the panel align with the holes in the fixing bracket. Don’t modify the module frame because doing so may void your manufacturer’s warranty.
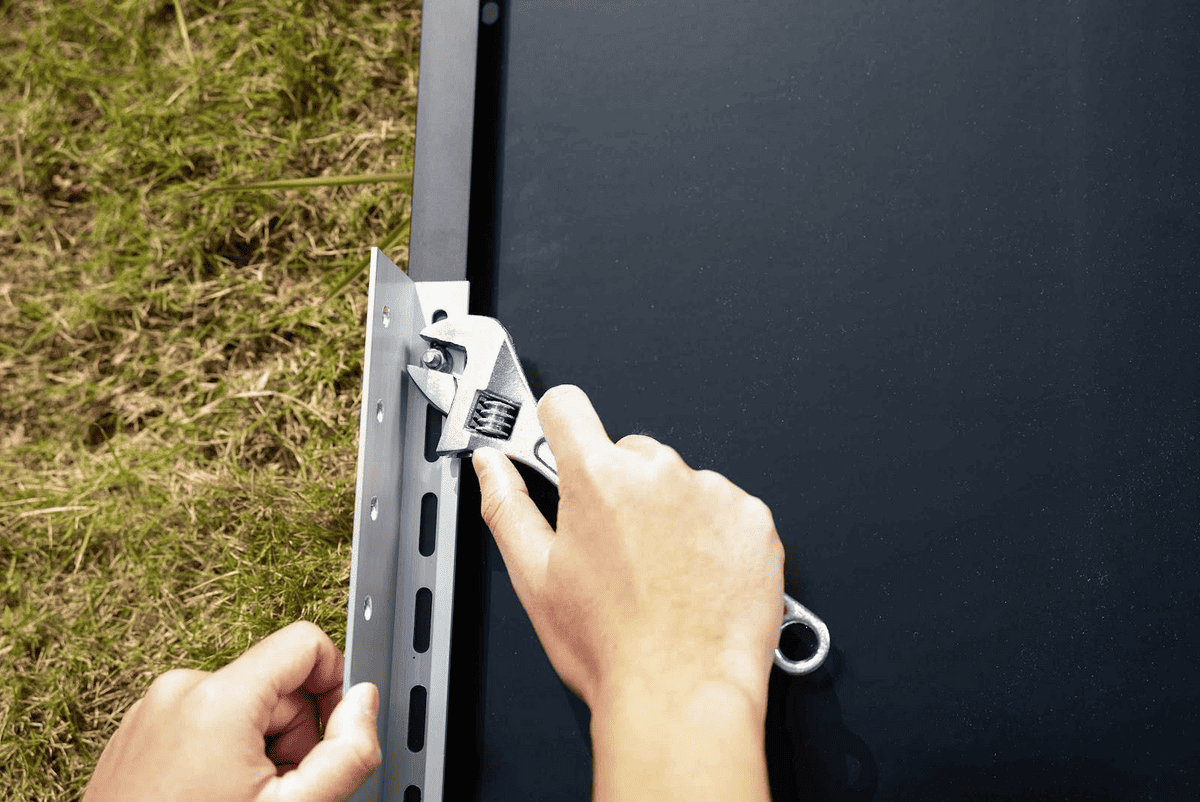
3. Attach the Fixing Bracket to the Solar Panel’s Mounting Hole
Now that you’ve aligned them properly attach the fixing bracket to the mounting hole of the solar panel.
Repeat this process on the other side of your solar panel. Ensure the bolts’ alignment are symmetrical and fix the mounting holes at the same level.
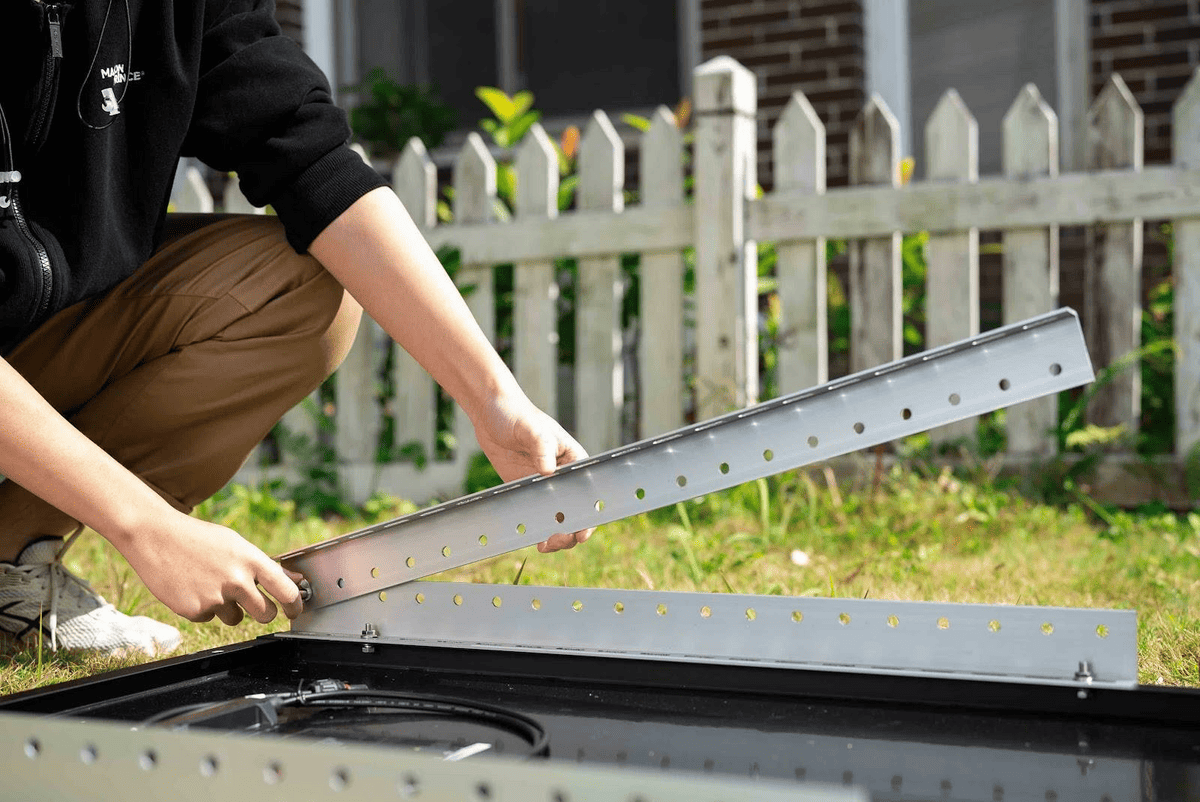
4. Attach the Other Leg of the Fixing Bracket
Connect the other leg of the fixing bracket to the first leg, connecting them at one end. It’s best to tighten the screw by hand so you can adjust the fixing bracket to the proper tilt angle (see more in the next step).
Do the same on the other side so you have all four legs of the fixing bracket attached.
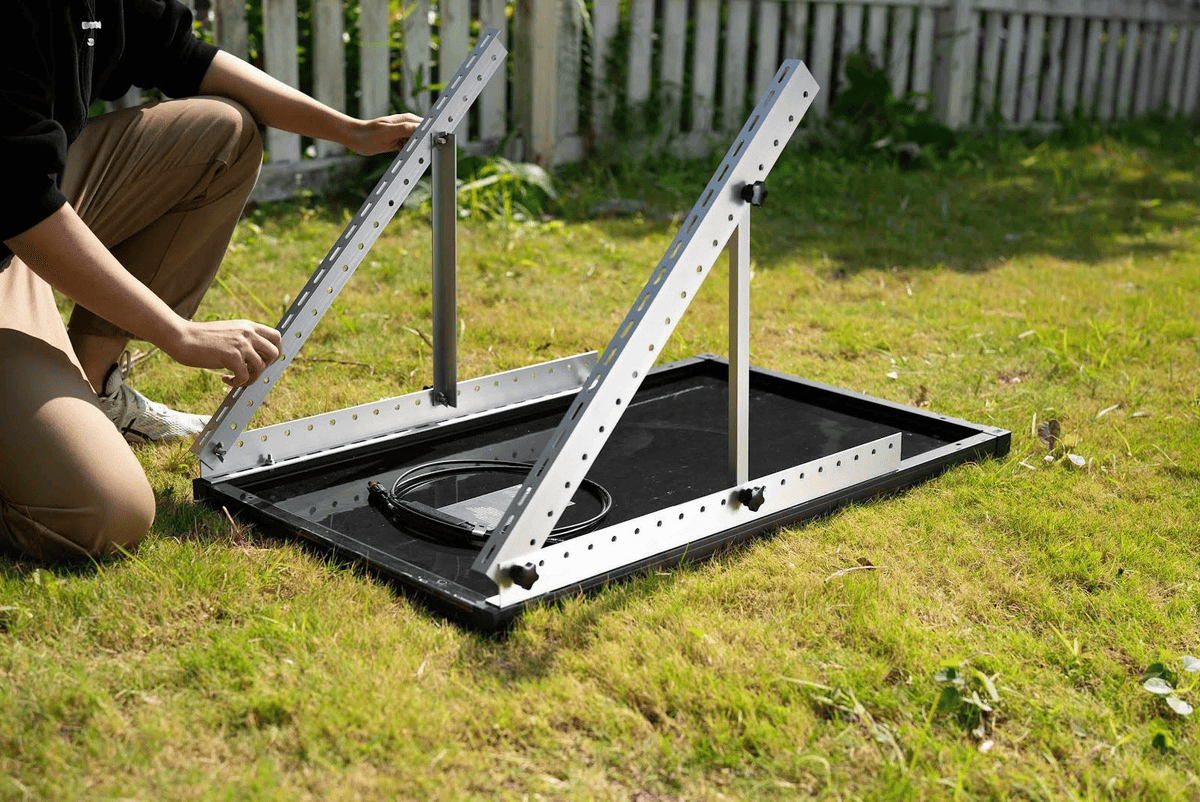
5. Attach the Adjustable Bracket to the Fixing Bracket
Now attach the adjustable bracket to the fixing bracket. Do this on both sides.
When you attach the adjustable bracket, ensure the installation tilt angle is at least 10 degrees. If you don’t, there is likely to be dust accumulation and decreased performance. If the tilt angle is less than 10 degrees, make sure to clean your solar panels more frequently.
It’s essential to think carefully about the tilt of your solar panels to get the most out of your investment and generate as much energy as possible. Several factors determine the optimal angle for your panels to capture as much sunlight as possible.
Do your research to find the optimal tilt angle for your solar panels based on where you mount them. Factors that impact the best angle for your panels include latitude, roof tilt (if roof mounting), and even the time of year.
Want your solar panels to chase the sun and efficiently optimize their angle?
Consider the EcoFlow Solar Tracker, which continuously pinpoints the ideal angle to the sun and adjusts your panel accordingly. Solar trackers can be particularly useful in areas with low average peak sun hours.
Once you decide on the angle and adjust the mounting hardware, you are ready to install the PV panel.
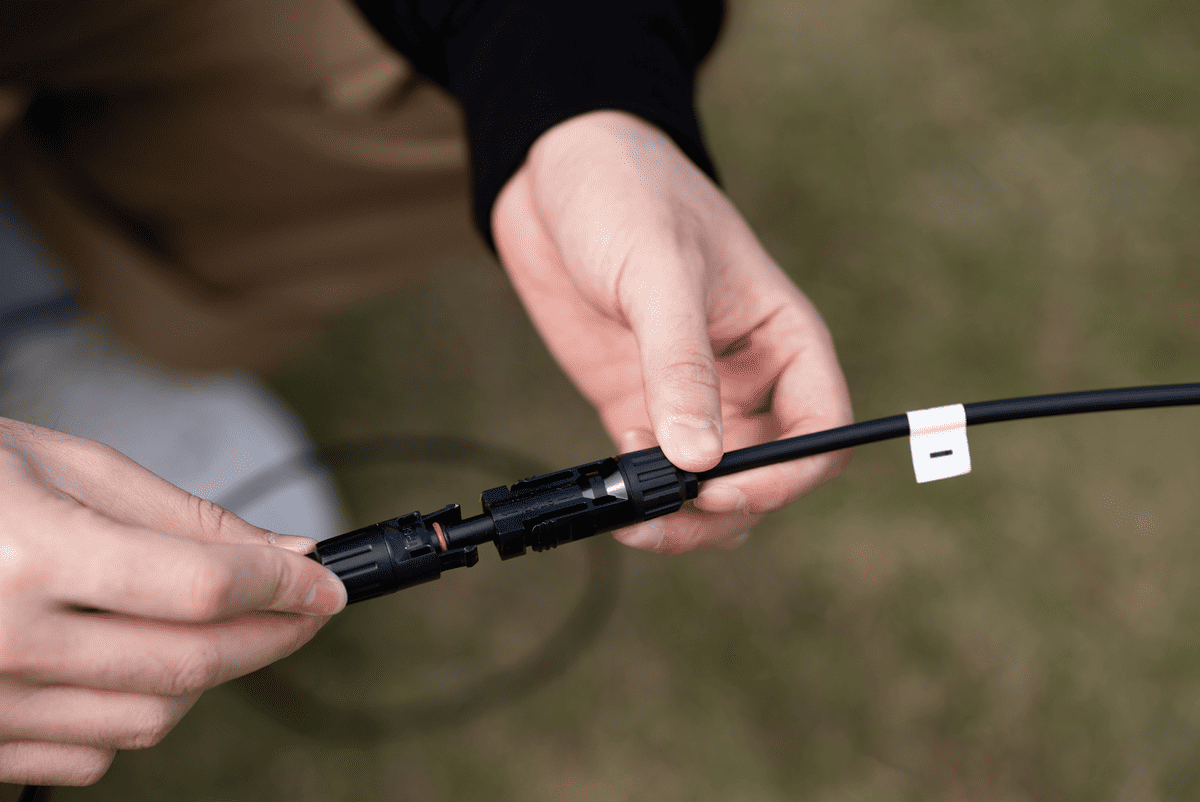
6. Connect Multiple Panels (Optional)
You can connect multiple solar panels either in series or in parallel. However, there should not be less than a 20mm (¾”) gap between two adjacent solar panels. The distance between the frame of a singular solar panel and the installation plane should be a minimum of 40mm (1.5 in).